

 By Gusto Guitar
A repeatable inspection record for appearance, specification, electronics, playability, and packing before an electric guitar order ships.
A guitar quality inspection is useful when it records both the requirement and the method used to check it. A box marked good is difficult to review if nobody records the tuning, string gauge, measurement point, or instrument identity. This guide presents a buyer’s inspection workflow for a defined order. It is not a published Gusto factory standard, a certification claim, or a universal set of setup tolerances. Agree the applicable specification and acceptance rules before using it to decide whether a shipment is ready.
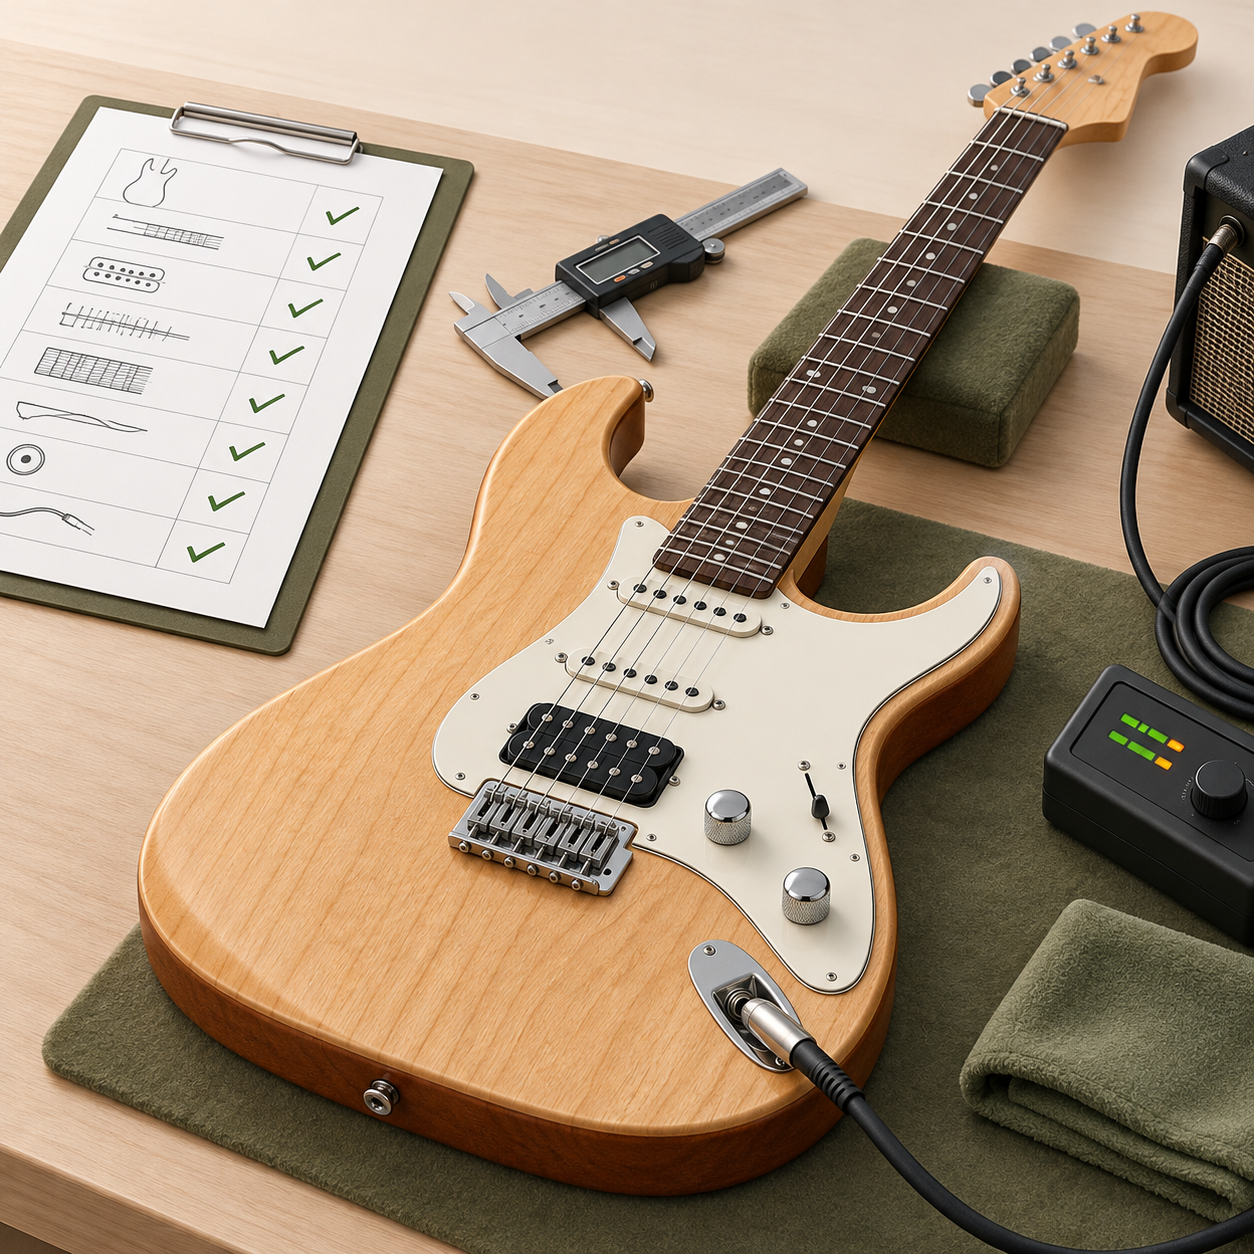
Prepare a traceable guitar quality inspection record
Give each inspection record an instrument or traceable carton reference, model, finish, specification revision, inspection date, and inspector. Record whether the instrument was selected randomly, chosen because of a reported concern, or supplied as a reference sample. Those are different inspection purposes and should not be combined without explanation.
List the tools used: a reliable tuner, a suitable string-action ruler, feeler gauges where required, a known-working cable, and a clean amplifier or test system. Include the approved string set and tuning. Let the instrument reach a suitable inspection condition following the maker’s handling instructions. Record environmental observations if they may explain a measurement, but do not invent an acclimatization period for every construction.
Match the delivered instrument to the specification
Start with identity before judging quality. Check handedness, string count, body style, finish, fret count, pickup arrangement, controls, bridge, and included accessories against the agreed sheet. A well-finished instrument can still be the wrong configuration. Photograph any difference with enough context to identify its location.
Separate direct observations from unverified declarations. You can count frets and inspect a visible control layout. You cannot reliably establish concealed wood construction or a pickup’s magnet grade from an exterior photograph. For those items, reference the agreed supplier documentation or request further evidence rather than recording a visual guess as a pass.
| Check group | What to record | How to judge |
|---|---|---|
| Identity and configuration | Model reference, finish, components, revision | Match to the approved specification |
| Appearance | Location, photograph, viewing conditions | Agreed cosmetic examples and criteria |
| Setup and playability | Strings, tuning, measurement method, result | Model-specific approved targets |
| Electrical function | Each switch position and control response | Approved wiring and function map |
| Packing | Contents, restraint, protection, carton identity | Agreed packing specification |
Inspect appearance under consistent conditions
Examine the front, back, sides, neck, headstock, and accessible joints under consistent lighting. Look for damage, contamination, unfinished areas, and deviations from the approved cosmetic reference. Record finish shade or wood-figure variation with care: natural variation and an actual finishing defect are different findings.
Agree how cosmetic limits will be assessed before inspection. Specify relevant viewing conditions and approved examples rather than relying on phrases such as perfect finish. A close-up photograph can exaggerate a tiny mark, while a distant photograph can conceal damage. Include both a contextual image and a detail when reporting an issue.
Check hardware mounting and accessible fasteners for obvious looseness, missing parts, or damage. Do not tighten everything indiscriminately. Excessive force can harm a component or obscure the original problem. Record the finding and refer repairs or adjustments to an authorized person following the component instructions.
Separate neck relief from string action
Neck relief describes curvature along the neck; string action describes clearance over the frets at a specified point. These measurements answer different questions. Record the string, fret location, instrument condition, and units for each. A bare number without its method cannot be compared reliably with a supplier’s result.
Fender’s neck-relief guide describes a capo-and-feeler-gauge method and shows that its own recommendations differ with fingerboard radius and instrument type. The transferable lesson is to document the method and use a relevant target. Its particular figures are Fender guidance, not automatic acceptance values for another manufacturer’s instrument.
For a purchase inspection, ask for the approved setup sheet for the actual model. If the supplier and buyer used different strings or tuning, resolve that mismatch before rejecting a measurement. Keep any adjustment record separate from the as-received result so that the report shows what was delivered and what was subsequently changed.
Play every string across the usable fretboard
Check open strings and fretted notes systematically rather than playing one familiar chord. Listen for a repeatable dead note, rattle, excessive buzz, or a note that stops during a bend. Identify the string, fret, playing action, and whether the symptom is audible through the amplifier. A short labeled recording is more useful than a general comment that the guitar feels wrong.
Inspect fret ends and accessible fret surfaces for concerns affecting normal handling and playing. Avoid treating every unamplified string sound as the same type of defect. Assessment should reflect the agreed setup, expected playing use, and documented symptom. If a problem requires leveling, nut work, or structural diagnosis, use an appropriately qualified technician rather than improvising a repair during acceptance inspection.
Check tuning and intonation as different functions
First establish that the open strings are tuned. Then check fretted pitch using a consistent method and normal fretting pressure. Fender’s intonation explanation compares a fretted twelfth-fret note with the corresponding harmonic and describes saddle movement as a way to adjust effective string length. This supports a methodical check; it does not supply a universal pass limit for every guitar.
Agree any allowable pitch deviation and test conditions with the supplier. Record a repeatable discrepancy rather than simply writing tuning problem. If a bridge or locking system behaves unexpectedly, confirm that the inspection follows the exact system’s instructions. Do not assume that two visually similar bridges have the same adjustment procedure.
Test the complete electrical function map
Use a known-working cable and amplifier to reduce uncertainty. Record every selector position and verify that it produces the intended pickup combination. Move each volume and tone control through its range. If the instrument has switching controls, test each specified function and compare it with the approved wiring description.
Note intermittent output, unexpected silence, uncontrolled crackling, or a control that does not produce its specified result. Check the cable and test equipment before attributing a fault to the guitar. Describe whether a symptom occurs continuously, only in one selector position, or when a normal connection is moved gently.
Noise assessment needs context. Pickup construction, test location, amplifier settings, and nearby equipment can affect what is heard. Record the setup and compare like conditions. Do not promise that every single-coil instrument must be silent, or diagnose a wiring defect solely because two different pickup systems produce different background noise.
Verify the packed order, not just the bare guitar
Confirm the agreed accessories and documents are present and match the instrument. Inspect the bag or case fit where supplied. Check that loose accessories are restrained and cannot strike the finish during ordinary handling. Compare neck and body support with the approved packing arrangement without assuming a generic carton suits every body shape.
Record carton identification, quantity, visible damage, internal protection, and any agreed labeling. A packing photograph documents the arrangement at that moment. It does not prove performance under a drop, vibration, or moisture test. If testing is required, define the test method and decision criteria separately with the relevant packaging or logistics specialist.
Agree the sampling and defect decision rules
Decide which checks cover all instruments and which cover selected units before the shipment is inspected. Define the lot, selection process, sample size, defect categories, and acceptance or rejection rules. If a named sampling standard is used, identify its actual parameters rather than treating the name or a percentage as a complete inspection plan.
For a small order, checking every instrument may be practical; for a larger lot, different checks may need different coverage. These are buyer and supplier decisions. This article does not prescribe a universal sampling level. A critical functional concern may warrant a different response from a minor cosmetic finding even when both appear in the same inspected lot.
Close findings with evidence
Each issue should have an identification reference, requirement, observed result, supporting evidence, agreed action, and verification result. Keep repaired instruments traceable through reinspection. A correction is not closed merely because someone reports that work was done; the relevant function or measurement should be checked again.
For example, if one selector position loses output, the report should identify the instrument, test cable and amplifier, affected position, and repeatable symptom. After the agreed repair, repeat the complete selector and control test rather than checking only that sound has returned. This hypothetical example illustrates documentation, not a claim about a particular supplier’s failure rate.
Choose an identifiable instrument from the solid-body electric guitar range when drafting the inspection record. For a different body construction, the semi-hollow vs hollow body guide helps identify construction questions that need their own inspection evidence.
Use the report to support the next order
Review recurring findings by model and component, then decide whether the specification, approved reference, packing arrangement, or inspection coverage needs revision. Keep those revisions controlled. A stronger next order begins with an improved requirement, not a longer collection of unexplained check marks.
When discussing an inquiry, identify the relevant instruments in the Gusto Guitar product range and request current model details before proposing acceptance targets. The practical goal is an agreed, repeatable inspection record that both buyer and supplier can interpret, while keeping the manufacturer’s actual specifications separate from general checking advice.

Get Best Guitars
Join Gustoguitar.com Newsletter to get more information of electric guitars, classical guitars, and all kinds of guitars.


